Copyright © 2025-2026 - Hammer Data Systems, LLC
DVPTZ uses FLTK 1.4 © 1996-2026 - Bill Spitzak and others.
Please take no undeserved credit and assign me absolutely no blame. Otherwise, this a free program, download, redistribute, and use at your own risk.
DVPTZ dynamically links to OpenCV and FFMPeg and through them, to many other dynamic libraries. Getting this program running is a bit of a chore. Sorry about that, but I would rather spend my time working on the program itself than figuring out ways to install all these libraries without tears. I am afraid that I have to let that be someone else's problem. I have supplied the output of ldd at the bottom of this page. Most of these libraries should already be installed on most linux desktop systems or will be installed automatically as you install others. Almost all are readily available in most distribution's repositories.
DVPTZ is available on github along with more up to date information and screenshots.
DVPTZ is a audio/video program for recording from video cameras and microphones and encoding the result into a compressed video file. It can record from USB cameras and IP cameras using rstp. Optionally, DVPTZ also supports NDI ™, both to receive video and as a transmitter. It can control PTZ cameras through Visca (USB/RS232/IP), NDI, or V4L commands.
NDI is optionally provided using the NDI SDK, available at ndi.video. NDI is registered trademark of Vizrt NDI AB.
Much of the following information is out of date. I will eventually get around to updating both the write-ups and screenshots.
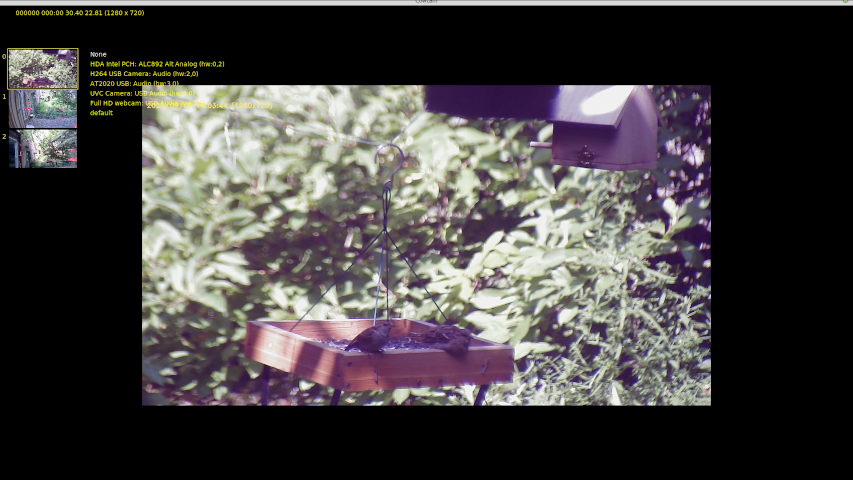
In the center of the screen, the live image from the default or selected camera appears. Along the left edge, live thumbnail images from all active cameras appear. Selecting a camera from the active thumbnail causes that camera's signal to become the center, recorded, signal. Next to the active camera thumbnails is a menu of all available audio signals, usually connected microphones. This menu appears whenever the system is not actively recording.
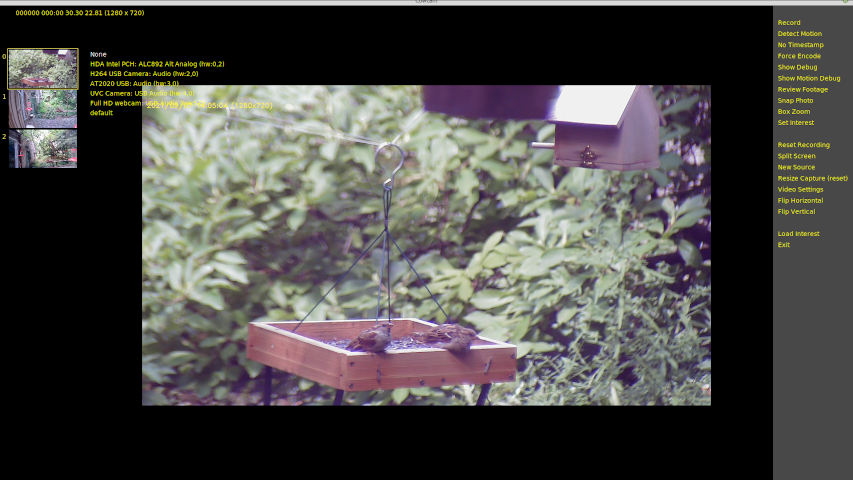
If the mouse is moved near the right edge of the screen, a menu appears that allows the user to turn on record, recoding via motion detection, turn on and off a visible timestamp, show various kinds of motion detection diagnostics, review and edit recorded footage, snap a still image, zoom, set areas of interest for motion detection, reset the raw recording (if you have no intention of encoding it into a video file), split the screen between the active cameras, select new video sources, resize the capture area (for follow motion mode), change video settings, flip the screen, and load and save interest areas for motion detection.
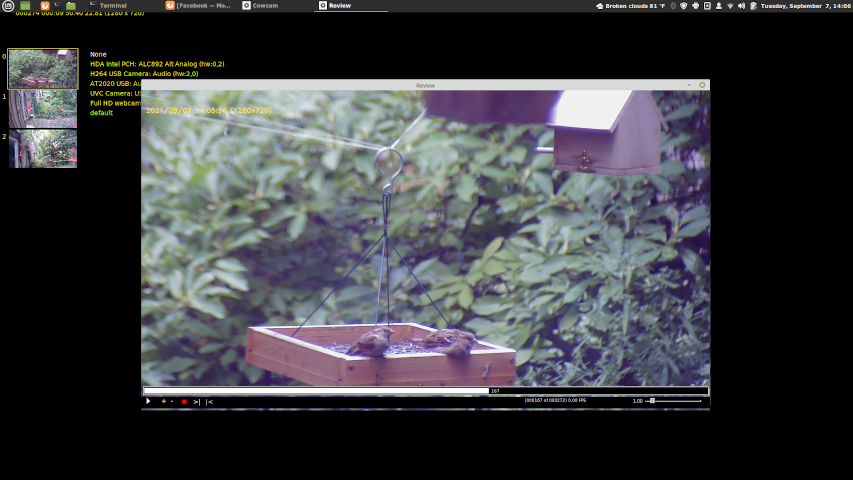
The video previewer / editor is a standalone window that allows simple selection of segments the user wishes to retain in the encoded video. Both audio and video are edited. Selecting the red button causes the raw audio and video files to be encoded using the selected segments. There is a scrubber that allows the user to scroll to particular portions of the video, as well as speed control for playback and encoding. There is a play button that ignores edits and another that plays only the selected portions. If no portions are selected, the entire raw file is encoded.
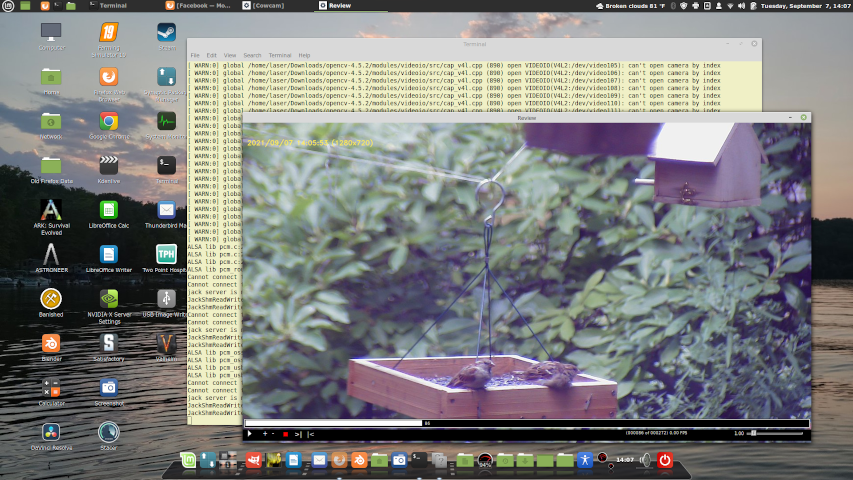
Here the standalone previewer / editor is seen on the desktop with the main window minimized.
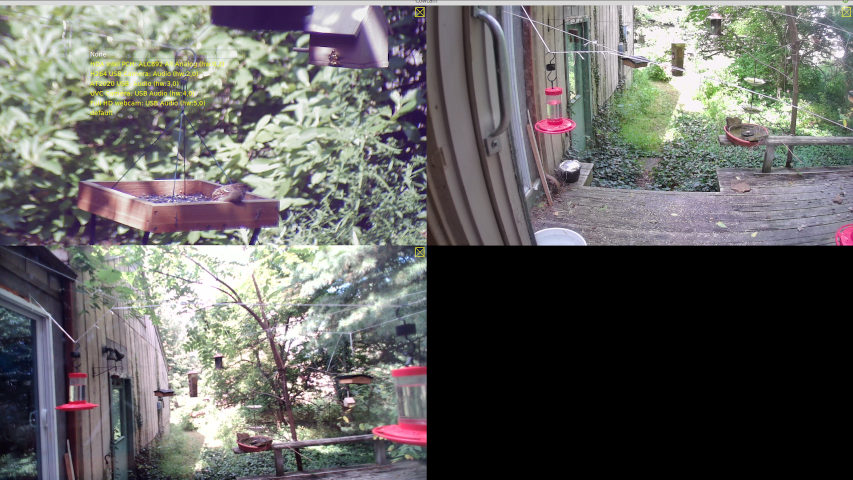
The main screen can be split and the user can monitor and select each of the active cameras.

Hovering the mouse over any the active camera thumbnails causes a larger preview window to appear showing the live image from that camera.
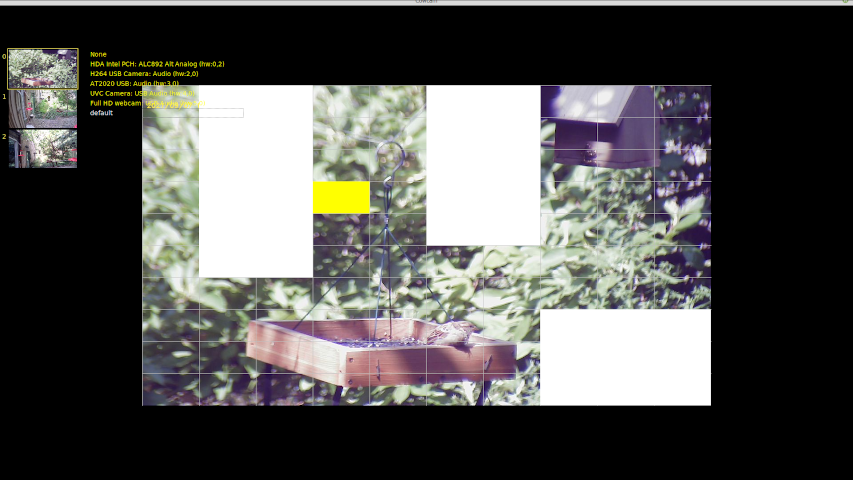
By clicking on segments of the divided main screen, the user can select areas of interest for the motion detector. It only triggers recording if there is motion detected in the selected areas.
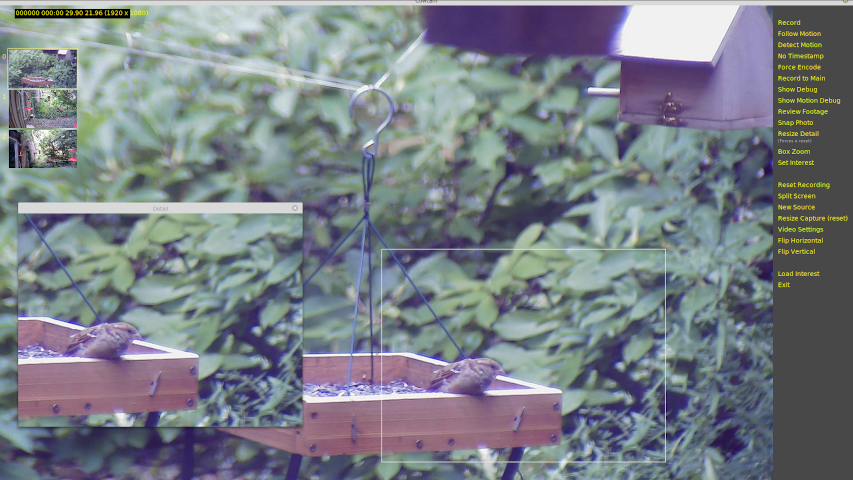
If the system is running in "main" mode, follow motion is available. Only the selected portion of the screen is recorded. The user can move the hightlighted box to follow the action by hand or can turn on automatic follow motion to have the system attempt to keep the recorded segment on the area with the largest motion.
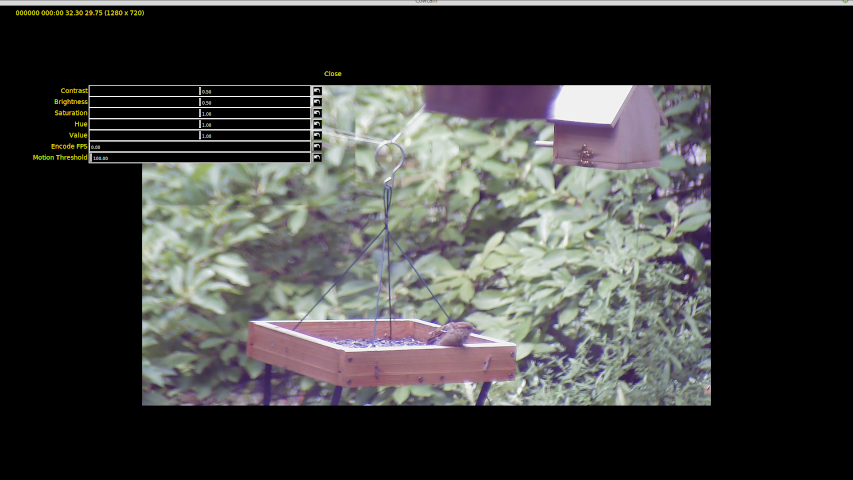
The video settings allow the user to change the usual contrast, brightness, etc., as well as the encoding frames per second for fast and slow motion, and the largeness of motion necessary to trigger the motion detector.
DVPTZ creates large ".bin" files containing the raw audio and video data. The raw audio is stored in mono, 16 bit, 22100 hz. The raw data is preceeded by a single 32 bit integer containing the frequency. The raw video file is collection of timestamped uncompressed RGB frames, with a small header containing the FPS, width, height, and depth. If the output is edited before being encoded, additional raw files are created contain the included frames and audio segments. Be warned, the raw video files, being uncompressed, can use a lot of disk space very quickly.
The encoded files default to a ".mov" container and are named using the date and time.
Command line arguments:
dvptz [--source=[N|URL[::BACKEND[:FOURCC]]][--width=n][--height=n][--help]
examples:

# Use the default USB dvptz
dvptz

# Specify a device
dvptz --source=/dev/video0

# Specify a device and a backend
dvptz --source=/dev/video0::V4L

# Specify a device and an alias
dvptz --source=/dev/video0[alias=Sony]

# Specify a device and a backend with fourcc code (must be 4 characters long)
dvptz --source=/dev/video0::V4L:MJPG

# Specify a NDI device with an alias
dvptz --source="ndi://NDI_HX (BZBGEAR-NDI-787264200195)"[alias="BZBGear"]

# Specify a Sony camera with an alias and several immediate adjustments
dvptz --source=/dev/v4l/by-id/usb-054c_SRG-120DU_Series-video-index0[alias="Sony SRG-120DU"][adjust_display_size=1920,1080][adjust_rgb=1.0,1.0,1.0][adjust_contrast=0.5][adjust_brightness=0.5]

# Immediate adjustments include:
# [adjust_display_size=1280,720]
# [adjust_input_size=1280,720]
# [adjust_contrast=0.5]
# [adjust_brightness=0.5]
# [adjust_saturation=1.0]
# [adjust_hue=1.0]
# [adjust_rgb=1.0,1.0,1.0]
# [adjust_alpha=1.0]
# [adjust_aspect_width=1.0]
# [adjust_aspect_height=1.0]
# [adjust_motion_threshold=100.0]
# [adjust_recognition_threshold=0.5]
# [adjust_recognition_interval=10.0]
# [adjust_capture_interval=0.1]
# [adjust_retrieve_interval=10000.0]

# Specify an audio input device
dvptz --audio_source=alsa_input.usb-audio-technica____AT2020_USB-00.analog-stereo

# Use an IP camera at a RTSP URL with login and password
dvptz --source=rtsp://your_login:your_password@url_for_your_webcam.org/live

# Use USB camera number 4
dvptz --source=4

# Load a setup file at startup.
dvptz --load_setup=Setups/sample.json

# Set main window width to 1920, Defaults to fullscreen.
dvptz --main_width=1920

# Set main window height to 1080, Defaults to fullscreen.
dvptz --main_width=1080

# Set preferred video width to 640
dvptz --width=640

# Set preferred video height to 480
dvptz --height=480

# Scale the interface to system wide screen scaling.
dvptz --auto_scale

# Remove the main window border.
dvptz --borderless

# Force a scaling factor to the interface.
dvptz --forced_scale=2.0

# Set preferred output video width to 1280. Output defaults to input.
dvptz --output_width=1280

# Set preferred output video height to 720. Output defaults to input.
dvptz --output_height=720

# Set preferred display video width to 1280. Display defaults to input.
dvptz --display_width=1280

# Set preferred display video height to 720. Display defaults to input.
dvptz --display_height=720

# Set the FPS to a specific value, avoiding testing
dvptz --fps=18

# Sets the interval between frames to a rigid length. Specified in seconds.
dvptz --interval=0.01

# Split the main screen between all the video sources
dvptz --split

# Record audio and video to raw files (unmuxed) and mux as a separate step.
dvptz --buffered

# Flip horizontally or vertically or both
dvptz --flip=horizontal --flip=vertical

# Do not record audio.
dvptz --no_audio

# Reopen old .bin (temporary files) to encode. Record is turned off.
dvptz --old

# Do not scan for USB cameras.
dvptz --no_scan

# Do not scan for input audio devices.
dvptz --no_audio_scan

# Scan for PTZ serial ports.
dvptz --scan_for_ptz

# Record the desktop, but do not allocate a specific camera to the task. Good for tutorials.
dvptz --record_desktop

# Record the desktop as another camera.
dvptz --desktop_camera

# Record the desktop as another camera, specifying area to record as x,y,w,h.
dvptz --desktop_camera=20,40,640,360

# Display the camera that is currently recording.
dvptz --display_recording_camera

# Recording follows the displayed camera. This is the default.
dvptz --recording_follows_display

# Record each camera to its own file so all cameras can record at once.
dvptz --record_all

# Blend automatically between cuts when editing with the previewer.
# Also fades in and out from black at the beginning and end.
dvptz --transition=blend

# Allows for PTZ camera control using VISCA over the specified serial port. A colon following the path
# followed by a 1, indicates that this interface does not reply.
dvptz --ptz=/dev/ttyUSB0:1

# Reset PTZ cameras to home position on launch.
dvptz --ptz_home.

# Initialize object detection. Without this object detection is not offered.
dvptz --object_detect

# Use alternate DNN/YOLO files for recognition. If anyone one of these is provided,
# the other two must also be present. The default values are:
# 	"yolov3-openimages.cfg"
# 	"yolov3-openimages.weights"
# 	"openimages.names"
# Or, depending on the value of --yolo_model=
# 	"yolov3.cfg"
# 	"yolov3.weights"
# 	"coco.names"
dvptz --yolo_cfg=cfg_filename --yolo_weights=weights_filename --yolo_names=names_filename

# Use the default YOLO filenames for COCO or OpenImages. This defaults to OpenImages.
dvptz --yolo_model=coco

# If JPEG streaming is turned on, stream the current camera's image to
# a custom server running at www.example.com on port 20000. Port 20001
# will be used as the PTZ control port. If port 10000 was selected
# port 10001 would be the control port.
dvptz --jpeg_streaming=www.example.com:20000

# Stream to a streaming server like Twitch or YouTube Live.
# The entire URL must be specifed, including the protocol specifier
# i.e.: smpt:// or rtmp://, etc. and any other URL embedded arguments
# like your key
dvptz --streaming=rtmp://www.streaming_server.com/your_key

# Stream to the server specified in --streaming= or save to a muxed file if no server is specified.
dvptz --streaming_only

# Streaming audio quality expressed as a factor. The default is best. Base value is 11025 hz, so.
# dvptz --streaming_audio_quality=good would be 11025 hz.
# dvptz --streaming_audio_quality=better would be 22050 hz.
# dvptz --streaming_audio_quality=best would be 44100 hz.
dvptz --streaming_audio_quality=good

# Embed the picture in picture stream into the recorded output.
dvptz --embed_pip

# Set the position of the picture in picture.
dvptz --pip_position=0.8,0.1

# Set the rgb color of the border around the pip. Set it to -1,-1,-1 for no border.
dvptz --pip_highlight=255,128,64

# Set the size of pip as fraction of its real size. The default is 1/4th (ie: 0.25)
dvptz --pip_size=0.35

# Allows for more than one pip.
dvptz --multipip=right

# Set the grid size for placement of sources. Default is 1 for no grid.
dvptz --grid_size=10

# Set the desktop audio monitor device (a null sink in pulseaudio).
dvptz --desktop_monitor=my_null_sink

# Do not query the system for available codecs and offer a menu of options.
dvptz --no_query_codecs

# Test the codecs found at current settings to determing if they are usable,
# eliminating those that are not from the offered options.
dvptz --test_codecs

# Timestamp video images.
dvptz --timestamp

# Disregard video setting when starting, using defaults and command line arguments instead.
dvptz --disregard_settings

# Cause the primary interface elements to have a transparent background.
dvptz --transparent_interface

# When scaling input images to output, keep aspect ratio and border excess.
dvptz --no_frame_scaling

# Crop image to display size rather than scaling it.
dvptz --crop_display

# Crop image to output size rather than scaling it.
dvptz --crop_output

# Add a plugin transition library file to be searched.
dvptz --transition=filename.so

# Add a plugin transition from the library specified in --transition_plugin_file=...
dvptz --transition_plugin=transition_name

# Add a plugin filter library file to be searched.
dvptz --filter_plugin_file=filename.so

# Add a plugin filter from the library specified in --filter_plugin_file=...
dvptz --filter_plugin=filter_name

# Add a screen capture plugin library file to be searched.
dvptz --capture_plugin_file=filename.so

# Force GUI elements to persist on the screen rather than appearing when the mouse approaches.
dvptz --retain_commands
dvptz --retain_cameras
dvptz --retain_audio
dvptz --retain_ptz

# Force all GUI elements to persist on the screen rather than appearing when the mouse approaches.
dvptz --lock_panels

# Animate (slide) the GUI elements when the mouse approaches.
dvptz --animate_panels

# Do not allow the user to change directories in the file selection dialog.
dvptz --exclude_directories

# Hide the status message.
dvptz --hide_status

# Select a camera to be active.
dvptz --select_camera=camera_name

# Select an audio source to be active.
dvptz --select_audio=audio_device_name

# Do not save the setup when exiting.
dvptz --no_save_state

# Do not load the last saved setup when starting.
dvptz --no_load_state

# Force the loading of a encoding summary file.
dvptz --encode_summary_file=./EncodeSummaries/resolve.json

# Use the specified PNG file as the background for VU meters. Transparent backgrounds are recommended.
dvptz --vu_meter=vu6.png
The Cow